The article has been updated successfully.
| Knowledgebase Home | Glossary | Favorites | Contact | Login |
| How to Import Contact Data From a Text Delimited File (*.TXT or *.CSV) into an ACT! Database | |||||||
|
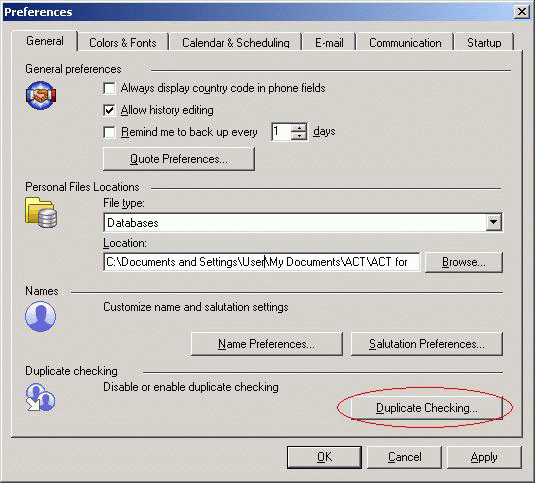
Question Before merging databases, it is imperative to verify the duplicate matching criteria in the database you will be importing to. Follow the steps below: Duplicate Matching Criteria: 1. Click the Tools menu, and then click Preferences. The Preferences dialog box appears:
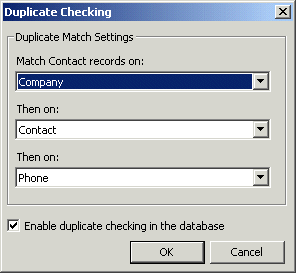
2. Under the General Tab, click the Duplicate Checking button. The Duplicate Checking dialog box appears; prompting you to verify the fields and the field order that will best distinguish duplicate contacts in the databases you will be merging. Note: Browse users will not have access to this feature.
3. Click OK to close the Duplicate Checking dialog box and save the settings.
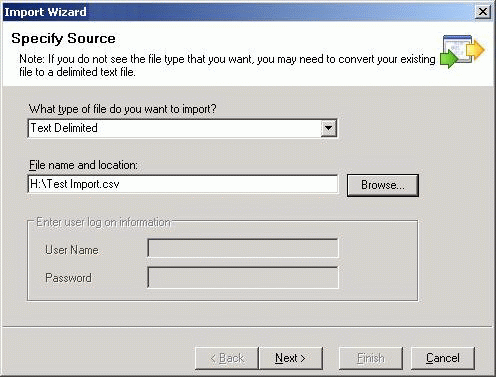
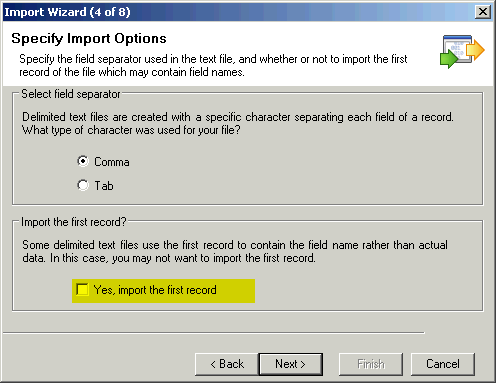
"Chris Huffman" , "Cordoba Coffee" , "400 Madison Avenue" , "New York" , "New York" A Tab Delimited file uses Tabs to separate fields and rows. ACT! import also requires that any Text Delimited file have either a .txt or .csv file extension. If necessary, change the file extension to .txt. For example, if the original file name is named Data.dat, change the file name to Data.txt. Importing Text Delimited Contacts: Follow the steps below to import Text Delimited Contacts into an ACT! database: 1. Open the database that you will be using as the destination database.
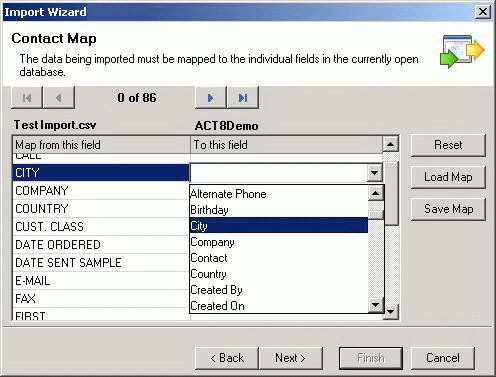
11. The Map from this field column represents the fields in the Text Delimited (source) file you are importing. The To this field column represents the fields in the current (destination) ACT! database. Complete the mapping by ensuring the To this field column has an entry for each field that you wish to receive data into. If a field is not mapped in the To this field column, any data in the source field will not be imported into the ACT! database. To change the mapping of a particular field, click in the To this field column, and then click the desired field from the drop-down. Note: you can only map a field to one other field, selecting the field again in this list will remove the first selection.
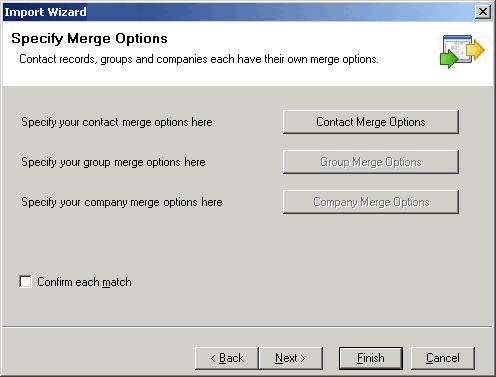
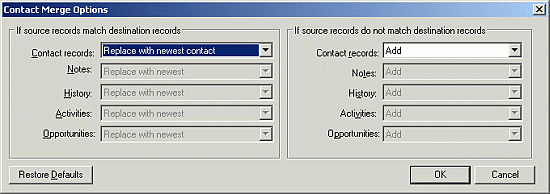
Note: Enabling the Confirm each match option will create a warning for any Contact that matches on two or more duplicate checking criteria fields, if you have many records in either database that will match your duplicate criteria, you will be prompted to manually confirm every match. This can cause delays importing a large number of matching records. If source records match destination records (according the your Duplicate Matching Criteria), merge options allow you to combine the data in duplicate records, replace with the newest data, replace with the source data or leave the data unchanged. This applies only to duplicate records: Merge - Imports data only into fields that are blank in the destination record Note: If these merge options are not adequate, you may create new fields in the destination database, and map these for the import of your data. Once the data is in the destination database, you can use the Replace feature in ACT! to copy (or swap) data between two different fields in your ACT! database.
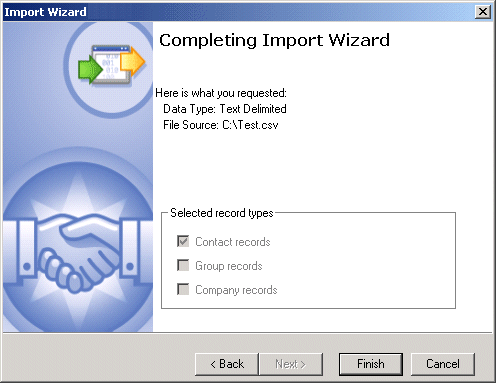
The Contact Merge Options provide options on how records will be merged for, Contact records. Click OK to return to the Specify Merge Options dialog box. 14. When the options have been set, click Next. The Completing Import Wizard dialog box appears:
|
|
||||||
| Related Articles |
| No related articles were found. |
| Attachments |
| No attachments were found. |
|
ACT! is a registered trademark of Sage Software, Inc.:::Allied Financial Software, Inc. Copyright 1999-2009
|