The article has been updated successfully.
| Knowledgebase Home | Glossary | Favorites | Contact | Login |
| Internet Explorer Script Error | |||||||||||||||||||||
|
Please do all items in this article to resolve the Internet Explorer Script Error issue. * In Internet Explorer, click the Tools button, and then click Internet Options. * Click the Advanced tab. * In the Settings list, under Browsing, select Disable Script Debugging (Internet Explorer) and Disable Script Debugging (Other), and then click OK. Part 2. ActiveX errors are caused by certain browser settings and misconfigured system files. To fix the problem, please adjust the settings in Internet Explorer by following the steps below: Solution 1:
Solution 2:
Part 3. If your browser was already set correctly, it's likely that you have a misconfigured system file. Here's how to reset the system file to the default settings:
After a moment, a dialogue box notifies you that the file was properly reset. Click OK in the dialogue box to exit. Compatibility ViewInternet Explorer 8 is a new release and some websites may not yet be ready for the new browser. Click the Compatibility View toolbar button to display the website as viewed in Internet Explorer 7, which will correct display problems like misaligned text, images, or text boxes. This option is on a per site basis and all other sites will continue to display with Internet Explorer 8 functionality. When you click on the Compatibility View button for a site, you don't need to do it again as the next time you visit that site the browser will show it in compatibility mode. If for some reason you'd like to go back to browsing with Internet Explorer 8 functionality on that site, simply click the Compatibility View button again. 
Try clicking the "Compatibility View" toolbar button to fix the problem. It's located next to the Refresh button on the Address Bar. You can maintain a list within Internet Explorer 8 for sites that should be displayed in Compatibility View. From the Command Bar, select Tools, and then select Compatibility View Settings to add and remove sites from this list. There are also options for viewing all websites and intranet sites in Compatibility View. 
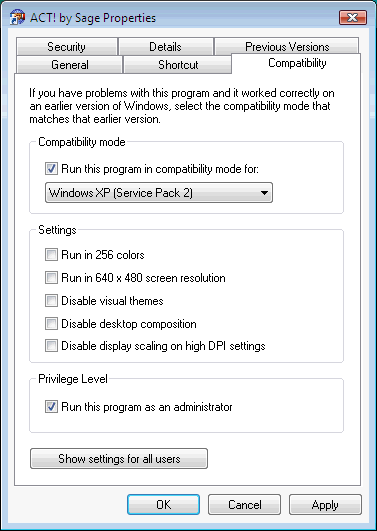
Add and remove websites to be displayed in Compatibility View. Log in to the machine as an Administrator and enable ACT! to run in Compatibility Mode for Windows XP. Please use all three of the following steps to resolve this issue.
Place ACT! in Windows XP Compatibility Mode:
|
|
||||||||||||||||||||
| Related Articles |
| No related articles were found. |
| Attachments |
| No attachments were found. |
|
ACT! is a registered trademark of Sage Software, Inc.:::Allied Financial Software, Inc. Copyright 1999-2009
|