The article has been updated successfully.
| Knowledgebase Home | Glossary | Favorites | Contact | Login |
| How to Automatically Perform Database Maintenance | |||||||
|
You would like details on how to set up your ACT! database to automatically perform Database Maintenance. Answer:
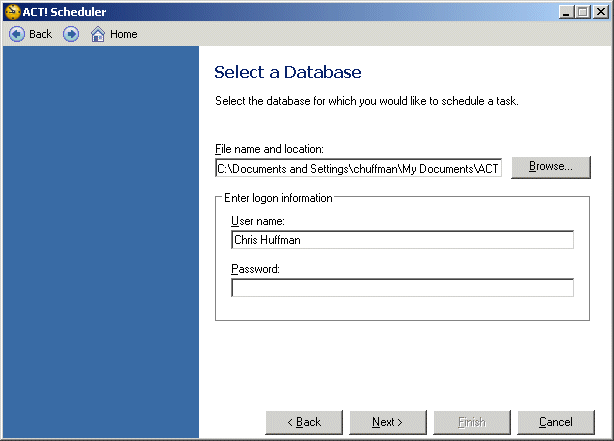
Click Create a task from the Schedule Tasks box. The ACT! Scheduler - Select a Database dialog box appears:
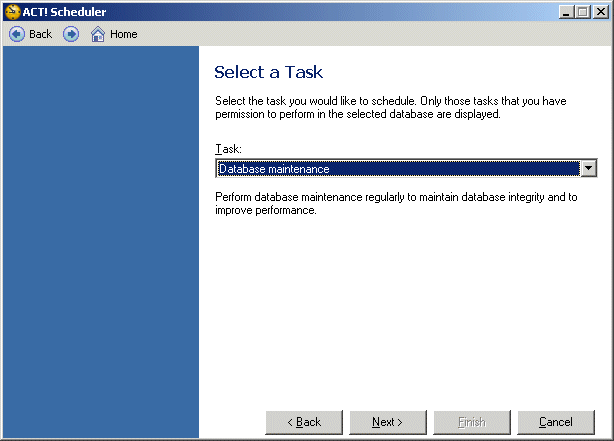
Click the Browse button. An Open dialog box appears. Navigate (if necessary) to, and then Open the desired database (.PAD) file. The ACT! Scheduler - Select a Database dialog box reappears. Enter the User name and (if necessary) the Password for this database, and then click Next. The ACT! Scheduler - Select a Task dialog box appears:
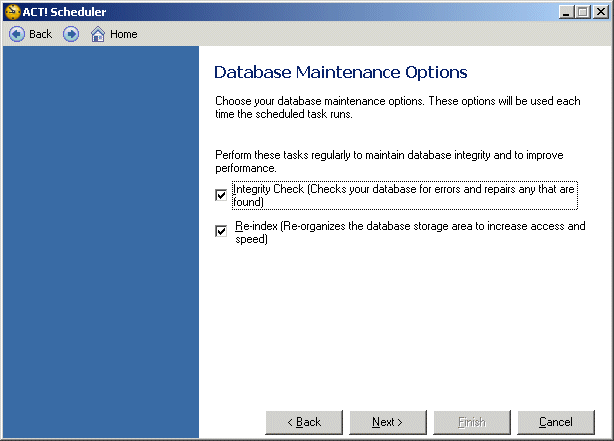
Click Database maintenance from the Task drop-down list, and then click Next. The ACT! Scheduler - Database Maintenance Options dialog box appears:
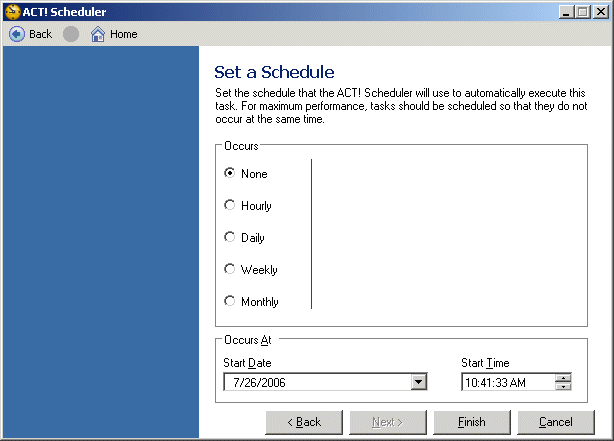
It is recommended that you leave Integrity Check (Checks you database for error and repairs any that are found) and Re-index (Re-organizes the database storage area to increase access and speed) options enabled, and then click Next. The ACT! Scheduler - Set a Schedule dialog box appears:
Enable an Occurs option of Hourly, Daily, Weekly or Monthly, and then enable the appropriate parameters corresponding to that option as follows: Note: Your computer must be running at the time that these tasks are scheduled for. However, the ACT! program does not need to be running. Daily - Every weekday (M - F) or Every (number of) days that you specify, up to 31 days. Weekly - Every (number of) Weeks on a weekday that you specify. Monthly - Every Month or Every other month scheduled on a specific day of the month or the First, Second, Third, Fourth or Last specific day of the week.
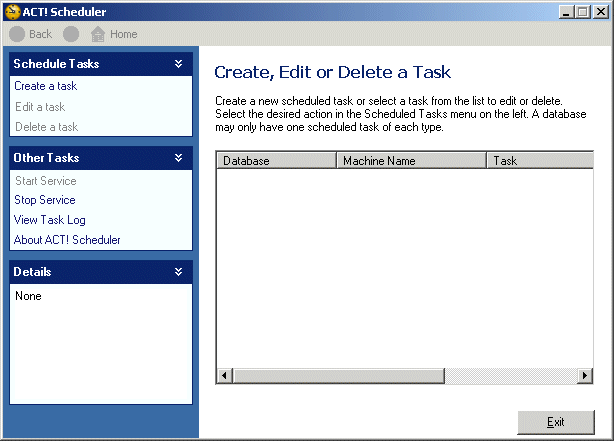
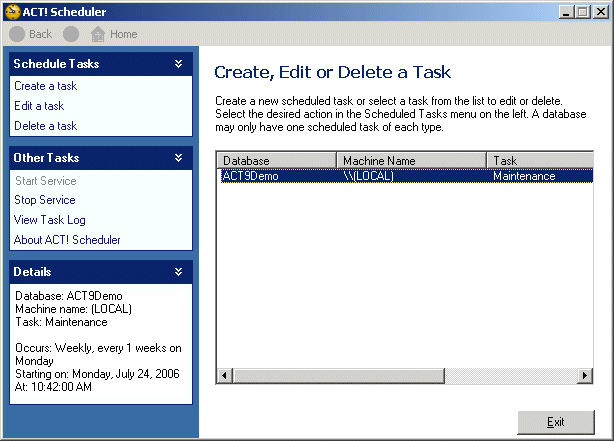
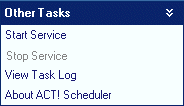
Ensure that the ACT! Scheduler service is running. You can identify if the services is running by the state of the ACT! Scheduler icon in the system tray. If you see this icon To Start the ACT! Scheduler Service: Launch ACT!. Click the Tools menu, and then click the ACT! Scheduler option. The ACT! Scheduler - Create, Edit or Delete a Task panel appears. Click the Start Service option from the Other Tasks section.
Launch ACT!. Click the Tools menu, and then click the ACT! Scheduler option. The ACT! Scheduler - Create, Edit or Delete a Task panel appears. Click the Stop Service option from the Other Tasks section.
Click Exit to return to the database or select your task, and then click Edit a task to change the task or click Delete a task to delete the task.
|
|
||||||
| Related Articles |
| Attachments |
| No attachments were found. |
|
ACT! is a registered trademark of Sage Software, Inc.:::Allied Financial Software, Inc. Copyright 1999-2009
|