|
|
| How To Uninstall ACT! By Sage 2008 (10.0) |
Question:
You would like to know how to uninstall ACT! by Sage 2008 (10.0)
Answer:
Completely removing ACT! from your computer is a two process function. When ACT! is installed the ACT! program files are installed as well as the Microsoft® SQL Server™ 2005 software and the creation of the SQL ACT7 instance. This process only removes the ACT! program files. Please refer to the How to Remove the ACT7 Instance section near the end of this Answer for detailed information.
Use the following steps to remove ACT!:
- Open the Windows® Control Panel, and then double-click Add/Remove Programs.
- Locate and click ACT! by Sage (Standard version) or ACT! Premium (Premium version).
- Click the Change/Remove button. The following InstallShield Wizard - Preparing to Install message box appears.
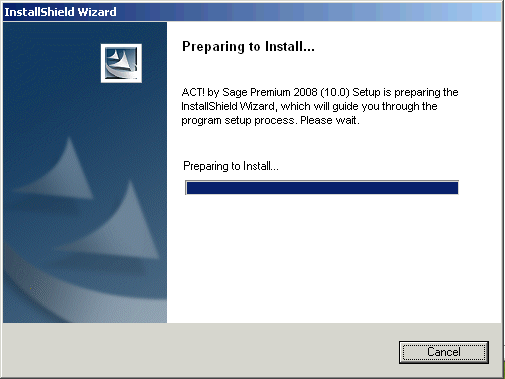
- When the Setup is prepared, the ACT! Setup - Welcome dialog box appears.
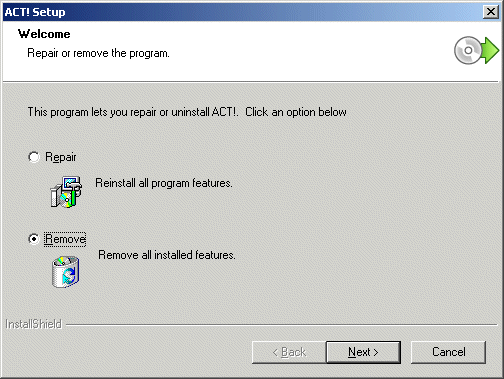
- Enable the Remove option, and then click Next. The Confirm Uninstall dialog box appears.

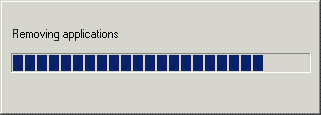
- Click OK. The following progress indicator appears.
- When completed the ACT! Setup - Uninstall Complete dialog box appears.
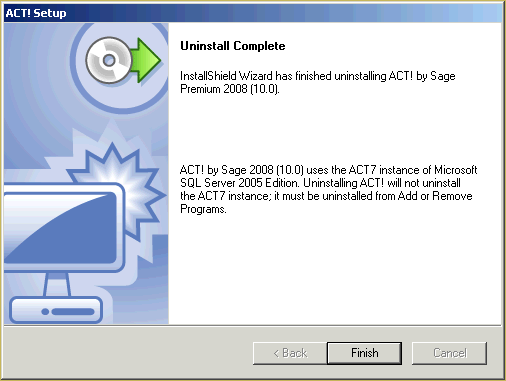
ACT by Sage 2008 (10.0) version
Important Note: The ACT! uninstall process does NOT remove either version (Standard or Express) of the Microsoft SQL Server software or the SQL ACT! instance. You can remove these from your Add or Remove Programs option. It is not recommended to remove the Microsoft SQL Server software as this could cause other programs to no longer function. For detailed information on removing the ACT7 instance, please refer to the How to Remove the ACT7 Instance section below.
- Click Finish to complete the process and close the wizard.
If the above process fails to remove ACT! from your computer, please refer to the following Knowledge Base Answer:
How To Manually Remove ACT! By Sage 2008 (10.0) and ACT! By Sage Premium 2008 (10.0)
How to Determine the Edition of Microsoft SQL Server 2005:
There are two editions of Microsoft SQL Server 2005; Express and Standard. Use the following step to determine which is installed:
- Open the Windows Control Panel.
- Launch the Add or Remove Programs panel.
- Locate and click Microsoft SQL Server 2005, and then click the Change button. The Microsoft SQL Server 2005 Maintenance - Component Selection dialog box appears.
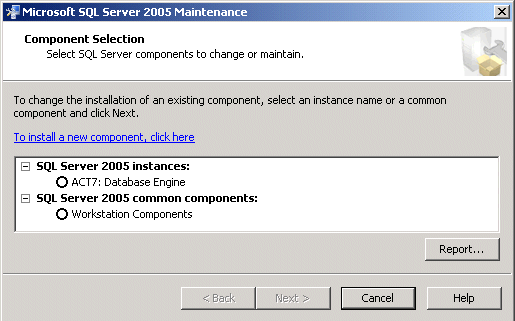
- Click the Report button. The Installation Report message box appears.
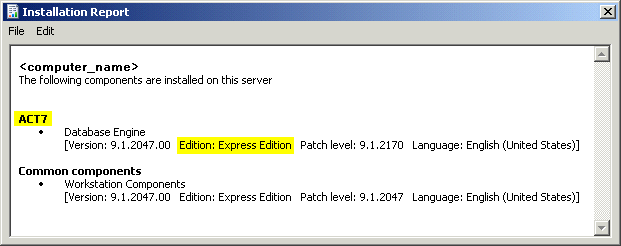
- Note the ACT7 entry; the Edition listing will display either Express Edition or Standard Edition.
- Close the Installation Report message box, and then click Cancel on the Microsoft SQL Server 2005 Maintenance - Component Selection dialog box. The following Cancel confirmation dialog box appears.

- Click Yes. The Add or Remove Programs panel reappears.
- Close the Add or Remove Programs panel, and then close the Control Panel.
Microsoft SQL Server 2005 Express Edition:
- Open the Windows Control Panel.
- Launch the Add or Remove Programs panel.
- Locate and click Microsoft SQL Server 2005, and then click the Remove button. The Microsoft SQL Server 2005 Uninstall - Component Selection dialog box appears.
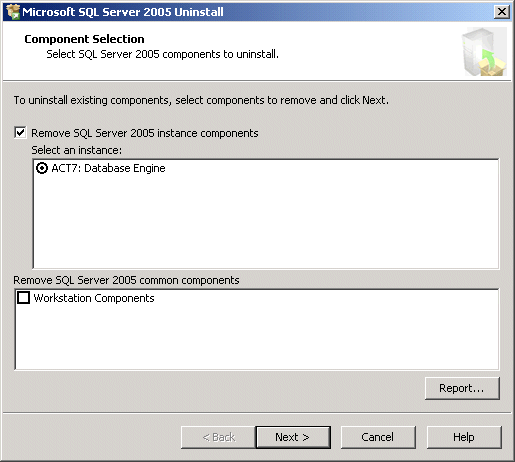
- Enable the ACT7:Database Engine option from the Select an instance section, and then click Next. The Microsoft SQL Server 2005 Uninstall - Confirmation dialog box appears. Do NOT enable the Workstation Components option in the Remove SQL Server 2005 common components section. This could corrupt all other SQL instances you may have installed and cause other programs to not function.
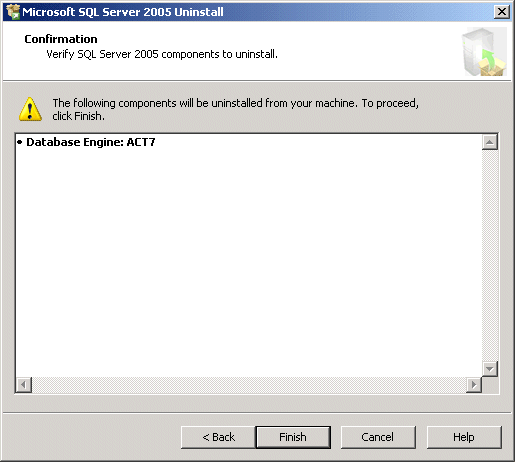
- Ensure your selection is correct, and then click Finish. The Microsoft SQL Server 2005 Setup - System Configuration Check message box appears briefly.
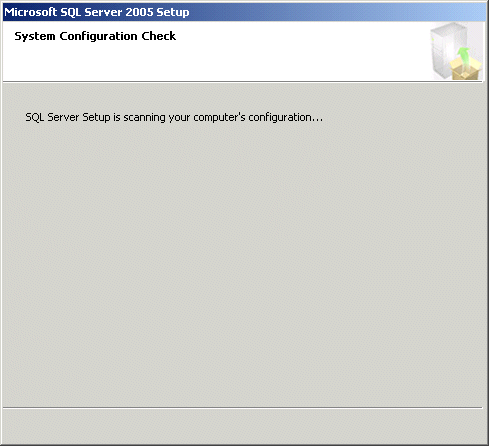
- When the configuration check is complete, the Microsoft SQL Server 2005 Setup - Setup Progress dialog box appears.
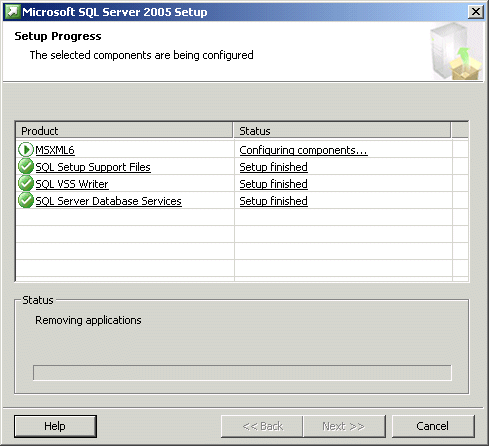
- When all listed Products have been Setup, the Add or Remove Programs panel reappears.
- Close the Add or Remove Programs panel, and then close the Control Panel.
Microsoft SQL Server 2005 Standard Edition:
- Open the Windows Control Panel.
- Launch the Add or Remove Programs panel.
- Locate and click Microsoft SQL Server 2005, and then click the Remove button. The Microsoft SQL Server 2005 Uninstall - Component Selection dialog box appears.
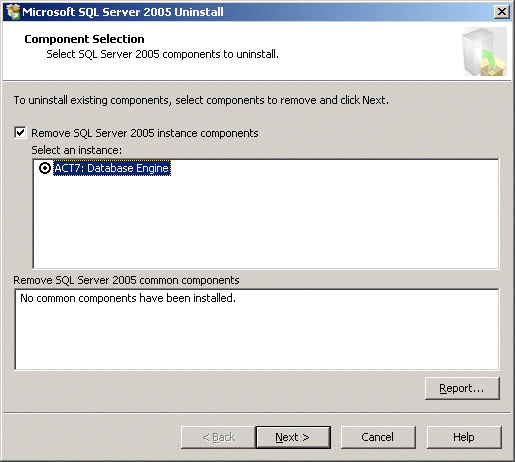
- Enable the ACT7:Database Engine option from the Select an instance section, and then click Next. The Microsoft SQL Server 2005 Uninstall - Confirmation dialog box appears.
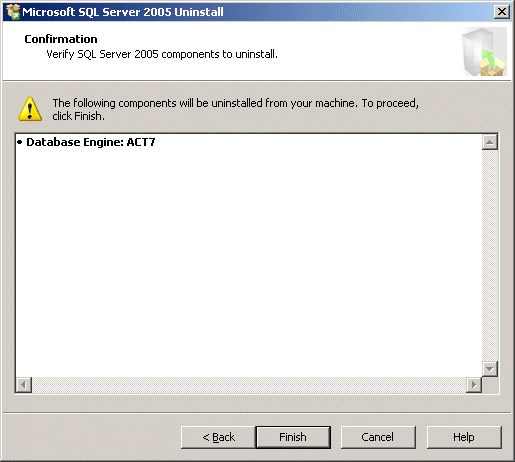
- Ensure your selection is correct, and then click Finish. The Microsoft SQL Server 2005 Setup - System Configuration Check message box appears briefly.
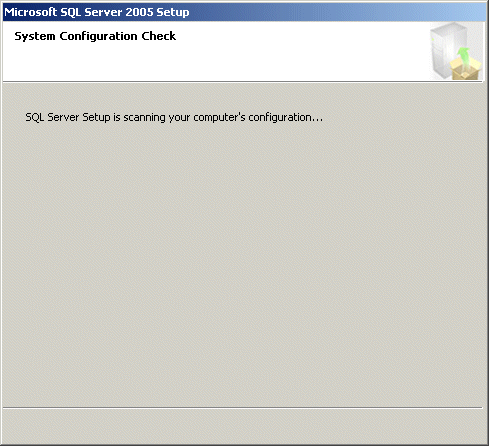
- When the configuration check is complete, the Microsoft SQL Server 2005 Setup - Setup Progress dialog box appears.
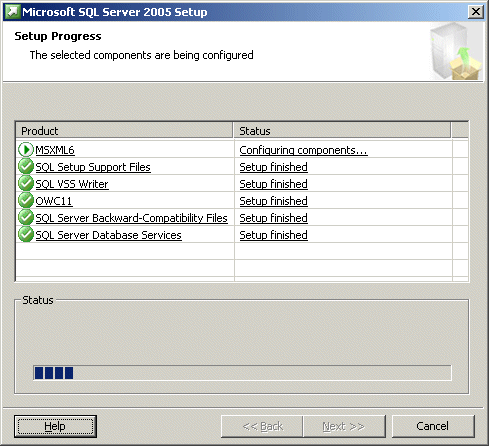
- When all listed Products have been Setup, the Add or Remove Programs panel reappears.
- Close the Add or Remove Programs panel, and then close the Control Panel.
If the above process fails to remove ACT! from your computer, please refer to the following Knowledge Base Answer: How to Use the ACT! Uninstaller.exe File
|
|
Article Details
Last Updated
27th of February, 2008
|
|
Thank you for rating this answer.
|
|
| Attachments |
|
No attachments were found.
|
 The article has been updated successfully.